
One of our holiday traditions growing up was having a special ornament for our Christmas tree each year. It’s such a sweet memory for me and I want to do something similar with Scarlette.
I found these little resin frames in the dollar spot at Michaels a couple of weeks ago and decided to make my own keepsake ornaments out of them. They were really inexpensive to make because I had most of the supplies on hand and they make for great gifts. Here is how I made them:
DIY Keepsake Ornament Instructions:
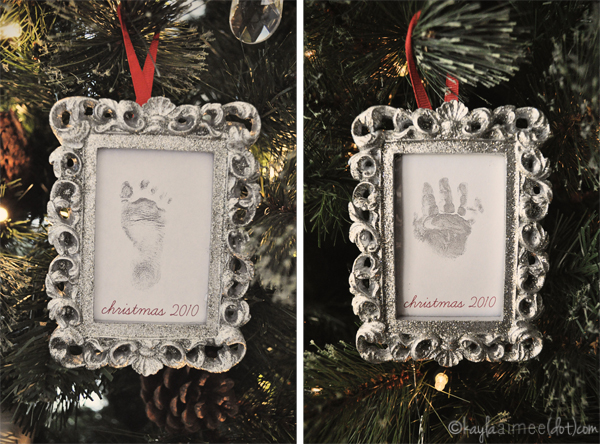
First collect the keepsakes or photos you want to use. Scarlette’s NICU nurses made hand and feet prints for me last Christmas so those are what I used. Random fact: Scarlette’s footprint measures less than 2 inches! You could also use your child’s artwork.
Scan the image (or take a hi-res photograph of it.) In your photo editing program add text and size the image to the measurements of your frame. If you don’t have a photo editing program, you can do all this at picnik.com for free. Or you could hand write the date on your image. Print out your altered image.
I wanted my frames to look vintage so I painted them. For these I used Martha Stewart Glitter Paint in Antique Silver. This is hands down the best glitter paint, it doesn’t flake off at all. The best way to get good coverage is to do several coats of paint. Apply each layer with short, quick strokes instead of long brush strokes to make it very glittery.
Insert your keepsake or photo.
Make a loop out of your ribbon and apply Terrifically Tacky Tape to the side of the ribbon that will face the back of the ornament and press it to the back of the frame. Here is the trick: use a heat gun to heat the Terrifcally Tacky Tape for a few seconds after you’ve applied it. Place something heavy over the ribbon for a few seconds while it cools. When you heat up the Terrifically Tacky Tape, you’ll never get that stuff off again. Seriously, that’s the way the knobs on my filing cabinet are attached right now because I’m too lazy to break out the drill. That’s also why my loop is off center. Whoops.
If you want to make it extra secure, add a dab of E6000 over the back of the ribbon. You could use hot glue but in my experience it will just peel off the back of the frame eventually. E6000 isn’t going anywhere.
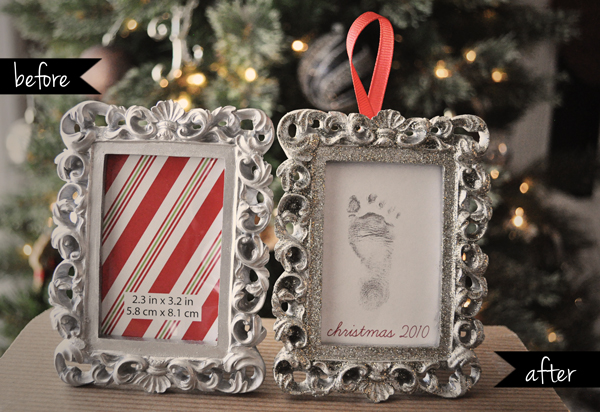
I love the way these turned out, I think Scarlette’s little hands and feet look so sweet on our tree. Here is a before and after so you can see the difference the glitter paint makes:

Glittered Stocking Charm Instructions:
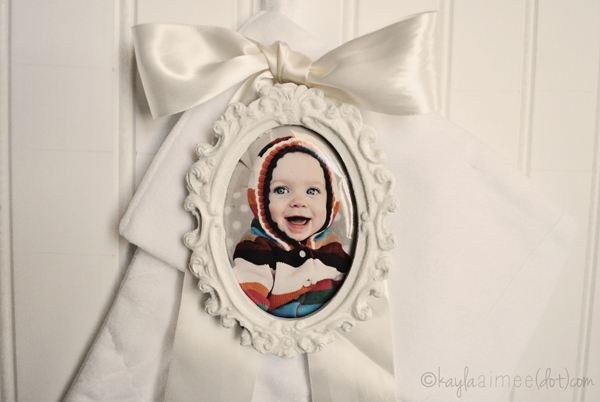
I didn’t like the color of the round frames (neon green!) so I painted them white first. I used Martha Stewart Summer Linen because it’s a really nice antique white. Then add a layer of Martha Stewart Glittering Glue. Trust me, this is the glue you want to use when glittering. Sprinkle liberally with glitter and shake off excess. Spray with a clear sealer, I like Krylon Glitter Blast Clear Sealer because it doesn’t gunk up the glitter. Attach a ribbon to the back as shown above. I chose a wider ribbon and made a bow for more impact. Actually, that is a ribbon I saved from our wedding! I’m really sentimental cheap. I used E6000 to adhere a button to the back so I could pin it to the stocking.
I used a photo in my frame but you could print off an initial or name. You could also just use glitter paint for these but I wanted a heavier glittered look. In real life it is super glittery but you can’t tell at all in this photo. I also need to run my hot iron over the ribbon to get the wrinkles out.
Supplies:
– Inexpensive mini frames. You can typically find these at the dollar store or craft stores.
– Terrifically Tacky Tape or E6000 adhesive (I use both)
– Ribbon
– Photos or keepsakes
Optional Supplies:
– Martha Stewart Glitter Paint or Martha Stewart Glittering Glue w/Brush + Glitter
– Krylon Glitter Blast Clear Sealer
– Embossing Heat Gun if you have one, if not a hair dryer will suffice.
– Something to use as a pin


