I made this image for the cover photo on my facebook timeline. Then I decided to save it as a layered .psd file in case any of y’all want to use it. It has all of the months so you can just switch out the date, background and photos as you like.
Here’s what it looks like on your facebook page:
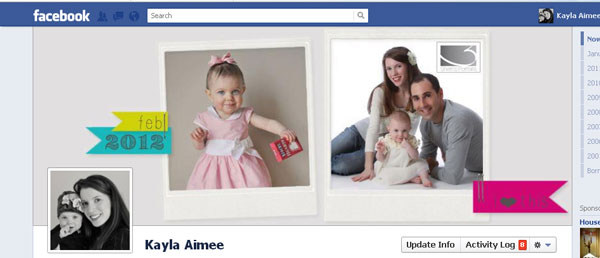
To use it, just click this link to download the template: fbtimeline_v2_ka
Here are the instructions w/step by step photos for adding your own images into the facebook cover photo timeline template:
1) Open the facebook timeline template in Photoshop or Photoshop Elements
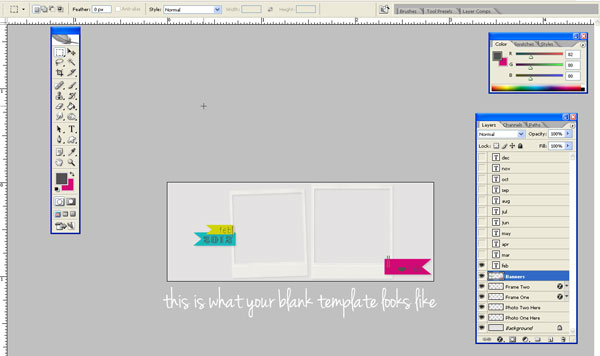
2) Also open the photos you want to place in the template
3) Make sure LAYERS are enabled. If you don’t see your layers, go to WINDOWS>LAYERS in the main menu
4) Click on the photos you want to use and copy it by going to EDIT >COPY (or you can click CTRL A and then CTRL C)
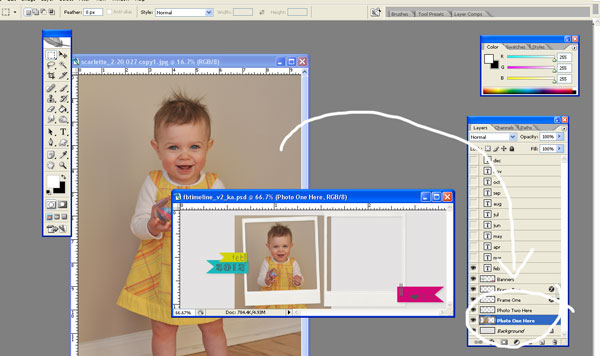
5) On your layers palette, click PHOTO ONE HERE to highlight the layer and paste your photo into it by going to EDIT>PASTE (or you can click CTRL V)
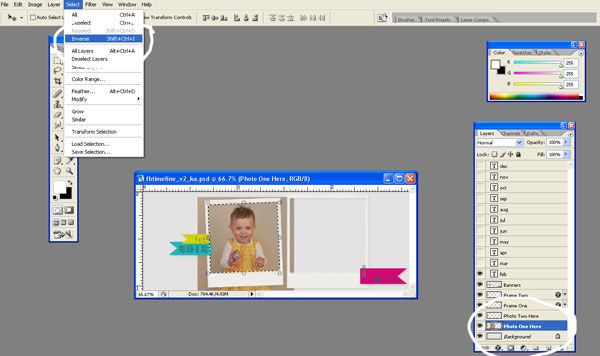
6) Click on the layer titled FRAME ONE in your layers palette. Select the MAGIC WAND TOOL from your tool box and then click on the inside of the first frame. You’ll see dashed lines around the inside of the frame when you do this.
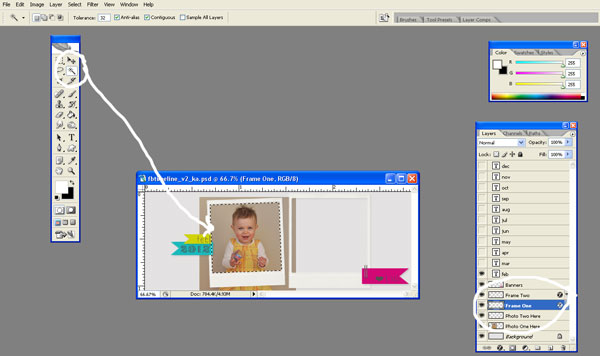
7) Now click back onto the layer titled PHOTO ONE HERE where you place your photo. On the main menu, click SELECT > INVERSE. This will make dashed lines appear both inside and outside of the frame. Click the DELETE button on your keyboard.
8) If you want to change the month, just click the little box next to the month you want to use.
9) Repeat the process using FRAME TWO and PHOTO TWO
10) Go to the main menu and click on LAYER > FLATTEN IMAGE. Then save it and upload it to facebook!
*You can also change the background color, before you flatten it just click on the layer titled BACKGROUND and choose your PAINT BUCKET tool from the toolbox. Choose a color and click anywhere on the background layer to change!


