 (One of the most popular e-courses I’ve been teaching for the past four years is the Bling Out Your Blog class. I’ve decided to no longer teach e-courses in order to focus on my writing – you can find my first book here! – so I’m making the material free on my blog in this series. I expand on how to grow your audience and all of the ways that you can earn an income from blogging in my ebook, The Must-Have Guide To Blogging which you can get here. Enjoy!)
So first things first? You need to start a blog!
You can do this free on blogger, or for a monthly fee on typepad.
Plenty of people monetize those sites wonderfully, however, if you are serious about blogging I recommend using a self-hosted wordpress blog. I moved to a self-hosted wordpress blog a couple of years ago after almost six years with typepad because it offered more capabilities in terms of design and monetizing. I felt really intimidated to make the change but I am so incredibly happy that I did.
There are several ways to do this but I am going to walk you through what I personally do because, well, that is what I know to be tried and true so I feel the most comfortable recommending it to you.
1.) You need to choose a name for your blog and then secure yourself a domain name. A domain name is your website’s address on the internet. For example, my domain name is www.kaylaaimee.com
Most people recommend keeping your domain name separate from your host. That means buying your domain separate from your hosting. Most hosting companies allow you to have one free domain so you can always do that option but keeping them separate is just an extra security measure.
I use GoDaddy, which is probably one of the most common websites for buying domain names. So you can visit GoDaddy.com and purchase the domain name that you want.
2.) You need to find a host for your blog. I use bluehost because they have an easy, one click install of wordpress and they have amazing customer support. Seriously, so helpful. Every single blog I set up for a client I host through bluehost because I know they will be reliable and easy to work with.
(Related: I’m using my referral links in this post, which helps me to offer this information for free. Bluehost pays me a small percentage when people sign up with them using my link. I already used Bluehost on my own blog and to set up blogs for my design client so becoming an affiliate meant that I could charge less for my services, which is a win-win for everyone!)
You don’t need to sign up for ALL the services they offer. I recommend getting their backup protection (very handy) and the domain privacy (so no one can see your address) – I don’t get anything for recommending those things, that’s just what I personally use. Hosting your own site is going to cost you about $80-$100 per year. If you are planning on making money from your blog, you can count that as an expense and write it off come tax time so don’t let the start-up expense scare you!
HOW TO START A BLOG:
Step One: Sign up with Bluehost

If you bought your domain name through GoDaddy then you’ll need to edit your nameservers. (If you bought your domain with Bluehost, skip down to Step 2) I know that sounds scary but it totally isn’t! If I can do it, you can do it. Here is how:
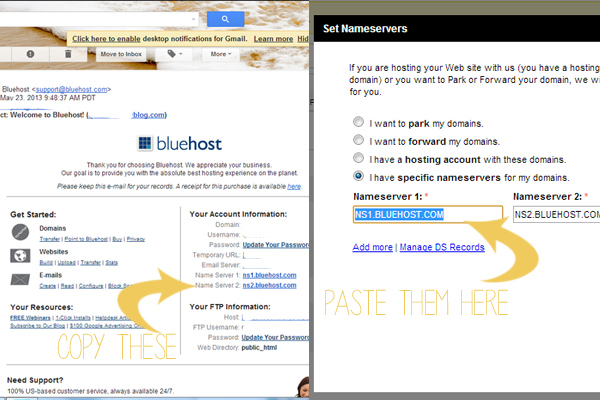
Bluehost sent you an email that says something like “Welcome!” and has lots of information in it. Open that up. You’ll see a little section on the side labeled NAMESERVERS. Now hold that thought 🙂
Then, log into your GoDaddy account. Click on MY ACCOUNT and then click on LAUNCH.
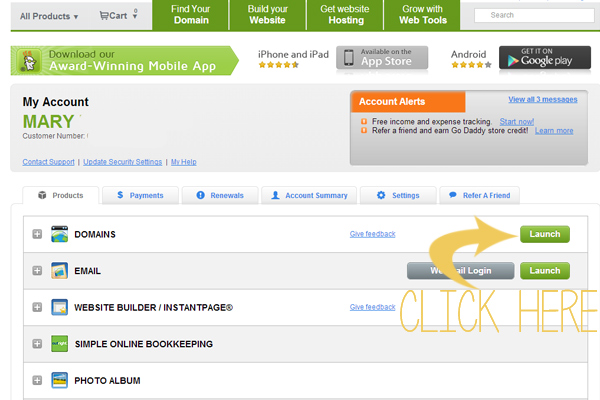
Next, click on your domain name. You’ll see all sorts of information but scroll down until you see NAMESERVER 1 and NAMESERVER 2.
Click on “I have a specific nameservers for my domains”
Now, simply replace the text in Nameserver 1 with the Nameserver 1 from Bluehost. Do the same for Nameserver 2. Then click OK. That’s all you have to do!
Step Two: Install WordPress
First, login to your Bluehost account and then click on WORDPRESS
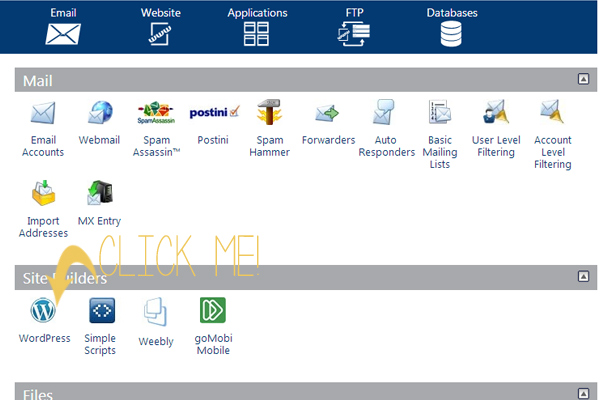
Underneath BLOGS click on WORDPRESS and then INSTALL
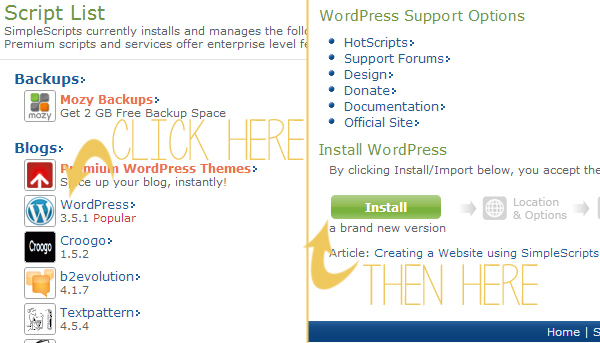
You have to agree to the terms of service but I typically uncheck the optional plugins and themes. Then click on COMPLETE
All done! Yay!
Now when you go to your domain name, you’ll see something that looks like this:
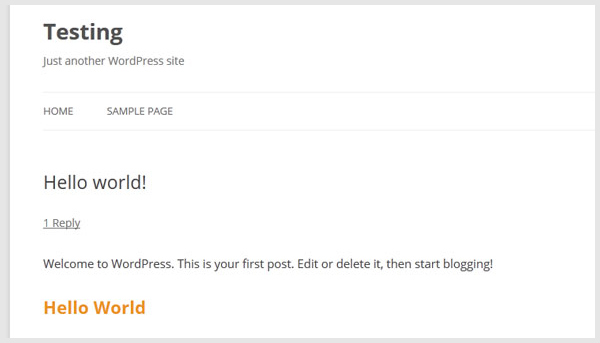
You have a website! It’s just not that pretty yet. To make it pretty, visit this next post on how to install a wordpress theme, where I talk about how to bling out your blog to make it look all fanchy schmancy. Or classic and simple. Whatever your design aesthetic, we’ll tackle it here!
If this was helpful to you, please consider taking a second to pin the image below! Thank you so much!
Want more blogging tips?
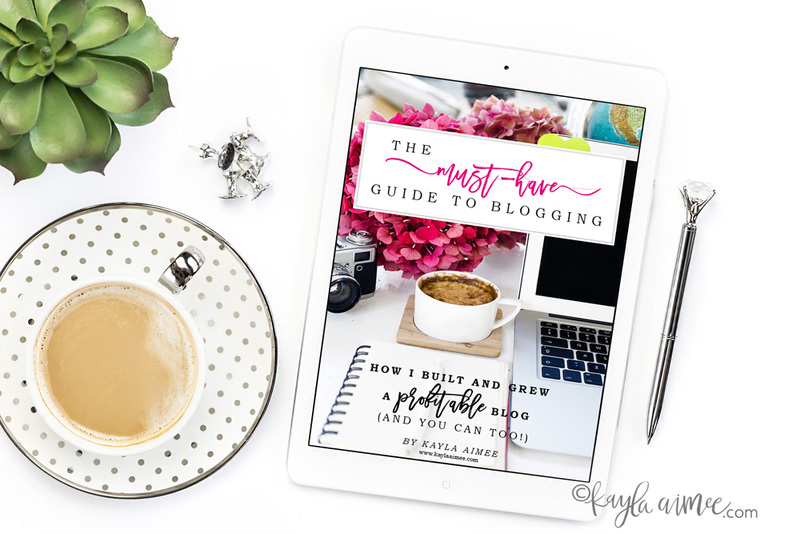
Want to start a blog or take your blog to the next level? My all new ebook, The Must-Have Guide to Blogging is over 200 pages full of my tried and true strategies + actionable ideas to help you build your blog, grow your audience and generate income! Just enter your email above to be the first to get your hands on it when it releases soon!
Plus, I’ll send you bonus blogging tips & tricks along the way!


