The really excellent thing about using a layered digital scrapbooking template is that you can create a scrapbook page in just a few minutes! You can use it over and over again and just change a couple of elements + photos each time for a totally different look.
Here’s a before and after example of it what the process will look like:
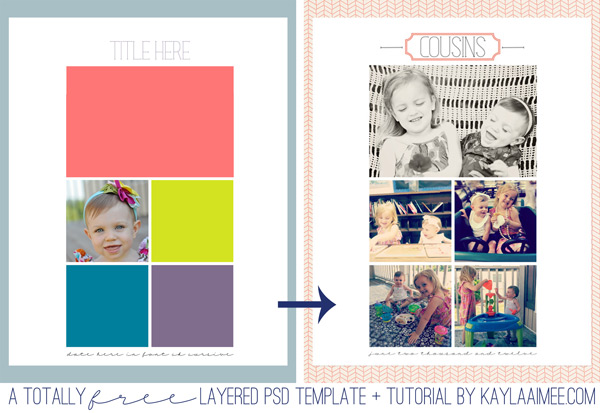
(You can click here to download template shown above and follow along!)
Here is how to customize your template in photoshop & photoshop elements
STEP ONE: First, open up your template in your photo editing program. Then, go to FILE > OPEN and open up your photo. Click on your photo and then click CTRL C so that the little marching ants show up all around the edge of your image. Alternately, you can just go to EDIT > COPY if you like.
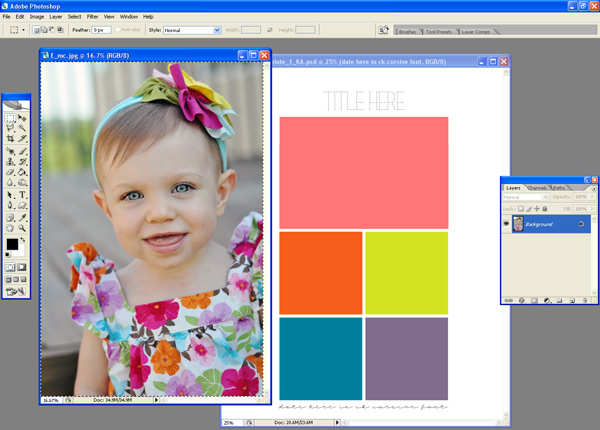
STEP TWO: Now click on your template. Then click on the LAYERS PALETTE and click the layer that you want to put your image on. For example, I want my image to be in the space where the orange box is, so on my layer palette I will click the layer where I see the orange box. (HINT: If you don’t see your layers palette, go to your top menu and click WINDOWS > LAYERS and that should make it show up.)
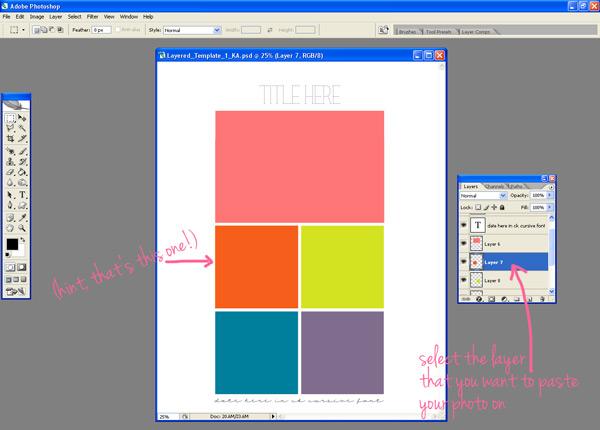
STEP THREE: Now click CTRL V (or you can just click EDIT > PASTE) to paste your photo right above the layer that is highlighted. Then click on LAYER > CREATE CLIPPING MASK. If you are using Photoshop Elements, you’ll want to choose LAYER > GROUP WITH PREVIOUS.
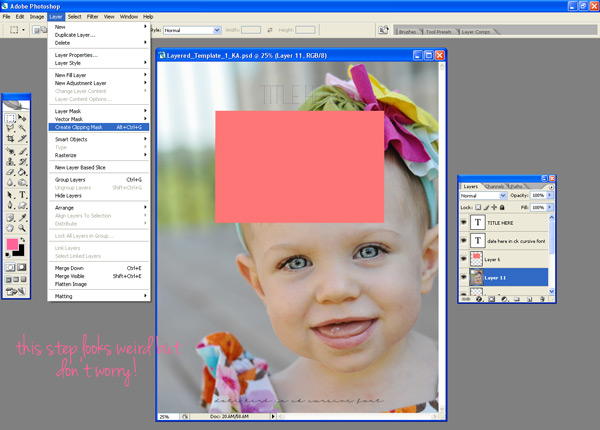
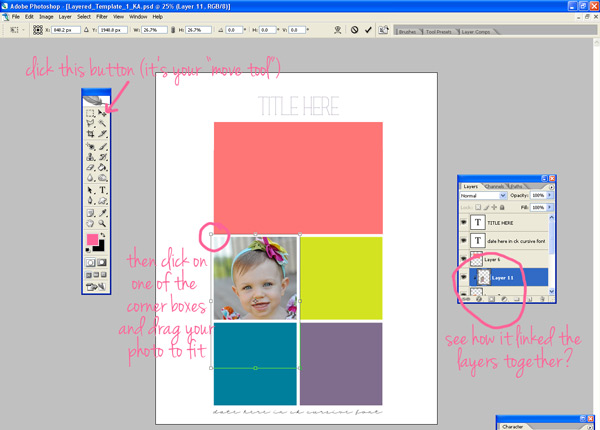
STEP FOUR: You’ll see that there is now a little arrow linking the layer with your photo on it and the layer directly underneath it. And now your photo magically fits into that shape! Now you want to click on your MOVE TOOL and then click on one of the little corner boxes around the photo. Now you can move the photo around so that it fits into the shape to your liking. By dragging the corners, you can make the photo larger or smaller or you can move vertically and horizontally. You’ll repeat this process for all of the different layers where you want to add photos or digital scrapbook paper.
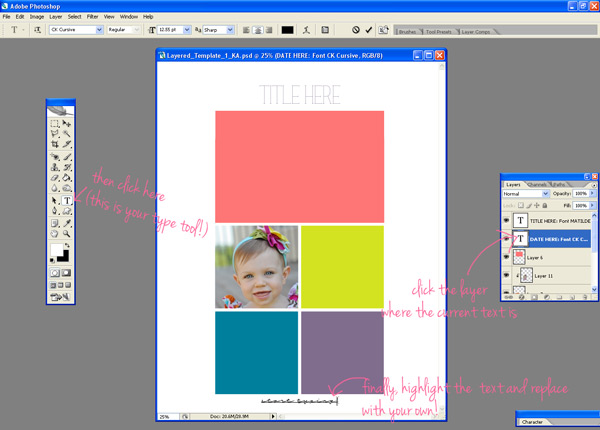
STEP FIVE: To change the text, just click on the layer where the corresponding text is. Then click on your TEXT TOOL. That’s the one that looks like the letter T. Finally, highlight the text on the page with your cursor and type whatever you like in it’s place.
STEP SIX: When you are finished embellishing your template, click on LAYER> FLATTEN IMAGE to compress all of those layers and then you can save it. Way easier than you thought it was, right?!
NOTE: The font I used in the title is MATILDE and the font I used for the date is CK CURSIVE, both found here.

