Now that you’ve complete step one and set up your self-hosted wordpress blog (yay!) it’s time to make it all pretty. It’s easy to get overwhelmed by this part but no worries, we’ll be tackling it in several small steps. “Baby steps to the elevator. Baby steps into the elevator. I’m in the elevator.” <- Name that movie!
There are a bajillion free themes that you can use on your wordpress blog. I mean, I haven’t counted them or anything but that seems like a reasonable number. In this tutorial, I’m going to tell you what I use and how I use it because that is what I am the most familiar with and thus, what I am the most comfortable working with.
First of all, login to your blog (you should have received an email with your login credentials!) and look at your dashboard. See where it says APPEARANCE? This is where we will be doing a lot of design work. Click on THEMES.
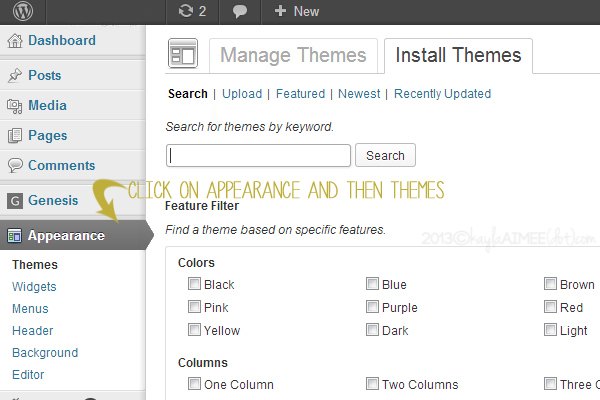
You can search for free themes here under the SEARCH label. It even lets you sort by color, columns, style, etc. You can spend some time sifting through the available themes and if you find one that you love you can click on it and choose it to be your theme.
If you are investing in a self-hosted blog, however, I am going to assume that you maybe want it to be a professional site or perhaps a site that you monetize. And if that is the case, then I recommend using the Genesis framework along with a child theme.
This is the part that can seem really confusing. Genesis isn’t a theme in and of itself, it’s a framework that will make your theme work easily with your site. (Here’s the part where you just trust me ;)) Think of your blog in decorating terms: WordPress is the house, Genesis is the curtain rods, and your child theme is the curtains.
Basically, the child theme is the decorative part and Genesis is all the stuff going on behind the scenes to make it look all pretty. Plus, Genesis gives you great options for improving your SEO (we’ll talk about that more later) and most of their themes are formatted to easily integrate ads (another thing we will talk about later!)
How To Set Up A WordPress Theme
I use Genesis + a child theme for my blog so that is what you are currently seeing (I change my child theme sometimes. Once you have Genesis installed you can switch your child theme as often as you’d like!) You can get them from studiopress.com – I love them because they have step by step tutorials on how to use Genesis and how to configure each theme that they sell, along with forum support!
So at this point, you’d go to studiopress.com and click on SHOP FOR THEMES and choose what theme you want! Don’t worry too much about design aspects- we can change the way the header looks and even the color/font. Just get as close to what you like as possible! You can click on each theme to view it in a demo so that you can play around to see if it suits you.
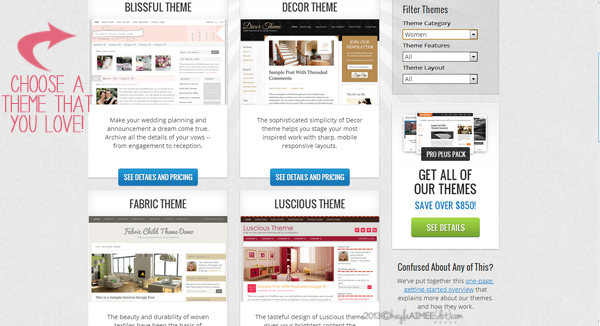
(Do you recognize the top left theme? I used to have that one on here!)
A popular theme that is pretty easy to customize is the modern blogger theme. You’ll see that you can purchase your theme + the Genesis framework as a bundle. (If you decide to change your theme in the future, you don’t have to purchase Genesis again!)
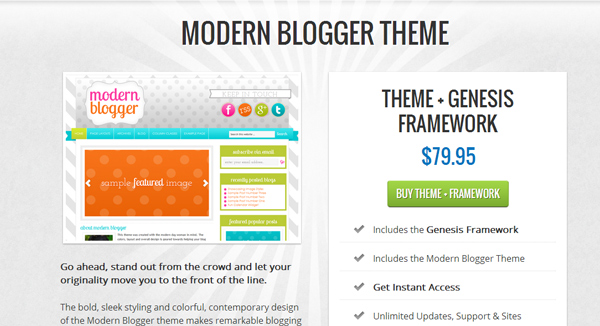
Once you make your purchase, you’ll receive the zipped files of both Genesis and the theme you chose! Don’t unzip them 😉
Personally, I have switched to using themes by Restored316 designs. I love her themes and her support is amazing and her site has step-by-step walkthroughs of how to exactly set up your theme.
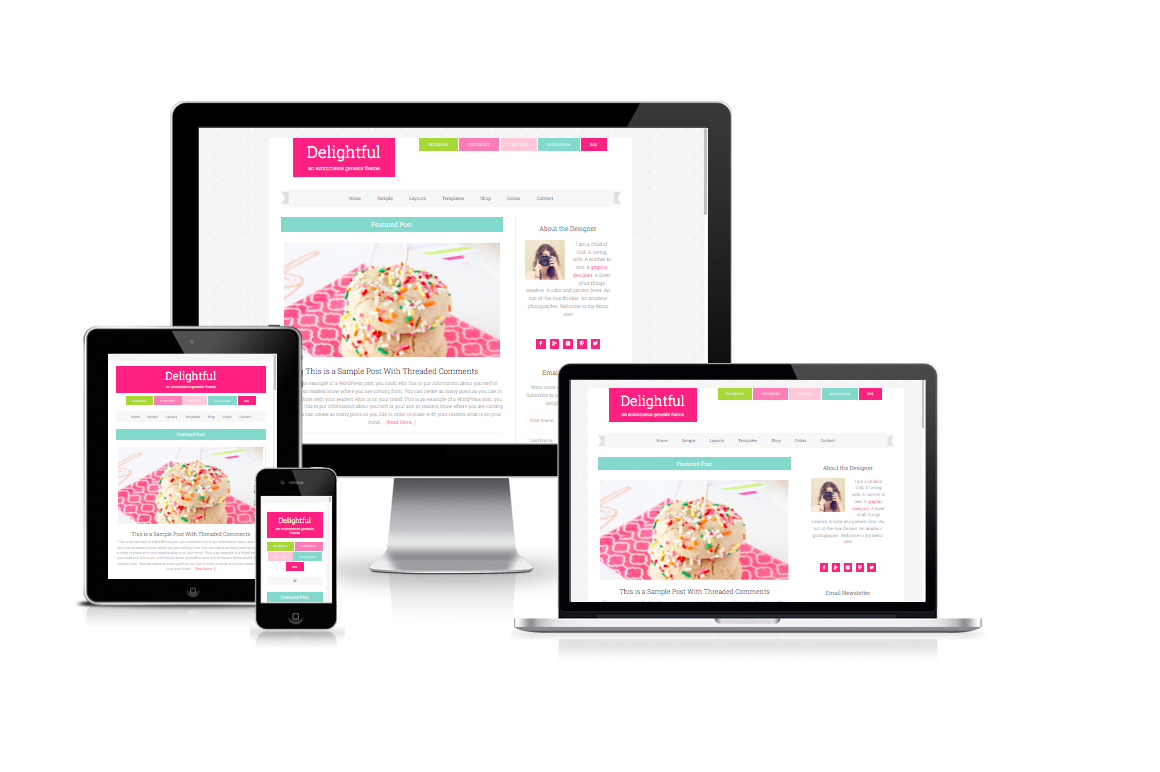
(If you choose to use a Restored316 theme (which I definitely recommend), you’ll need to purchase just the Genesis framework from studiopress.com here and then purchase your theme separately from Restored316 designs. Then continue to below!)
Now once you’ve made your purchases go back to your blog and click on DASHBOARD and then APPEARANCES and then THEMES only this time, choose UPLOAD
Then select the Genesis zip folder that you downloaded and click on INSTALL NOW.
(Be sure to do this first, it’s important to install Genesis before the child theme!)
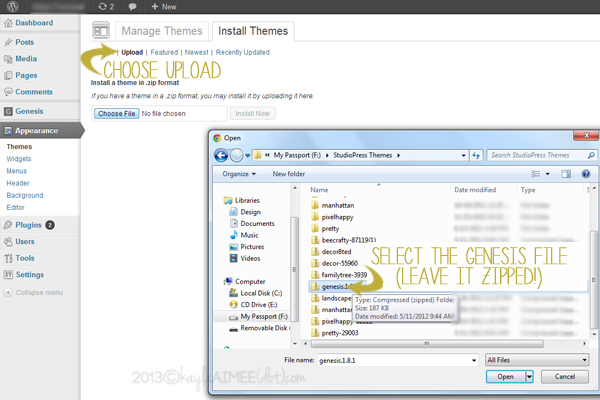
After that, you’ll want to repeat the same thing using your child theme so go to APPEARANCE, then THEMES, click UPLOAD and choose the zipped file of the theme you chose and then click INSTALL NOW.
You did it! You’ve installed a theme. The front of your site should look similar to the demo site of the theme that you chose. Don’t worry if it’s not identical because we need to move a few things around (like sidebar widgets!) to get it looking pretty.
But now your theme is installed and next up, we’ll start personalizing it by changing the header, configuring your menu and sidebar, changing your fonts and colors and more!
Also? We’re done spending money, y’all. There are some initial costs involved in starting a blog, like paying for your hosting and investing in a good theme. But after that, we’ll be heavily relying on free resources to decorate it because, well, y’all know I love free stuff!
(If you used a theme from Restored316 Designs, head over to her site and click on SETUP AND SUPPORT and then choose the theme you purchased to see step-by-step setup instructions!)
If you found this helpful, please consider pinning the image below! Thank you so much for the support!
*This Bling Out Your Blog series is an updated version of a popular e-course that I taught for a few years. I’m now offering it as free content on my blog because my 2 year old likes to try to climb things and jump off of them so I no longer have the time to dedicate to facilitating online classes. You can click here to see all of the posts in this ongoing series. Enjoy!
Disclosure: During each tutorial I may recommend certain products to you from vendors that I am affiliated with. Being an ‘affiliate’ means that I have an established relationship with those vendors and when readers purchase something from them, I receive a small commission. The reason I do this is because A) the nature of the post is such that I want to recommend things like my favorite photoshop actions or blogging theme during the course of it anyhow and B) using these affiliate links to recommend products that I use means that I can post these online lessons for free, rather than charging for them like I used to. You can read my full disclosure here.


